Category Archives: Projects

Updating the ‘Ol To-Do List

Every now and then I like to publicly declare here on the blog all the things I want to get done in the next few months. It helps keep me focused and accountable, I think.

One of these days I am going to get around to finishing the wing chairs. The thing that’s holding me back is that they’re perfectly functional as-is. I put the old cushions back on them and they are comfy as ever (as long as all the mismatched fabric and protruding stuffing doesn’t make you nervous). I’m having a hard time getting motivated to jump back in to a project that gave me so much grief the first time around, but the payoff is worth it so I’m determined to get ‘er done sometime in the next three months or so. For the record, they look much worse now than they did when I snapped the photo below. Time has taught me that my original efforts didn’t have what it takes to survive in a home with cats.

I’d also like to actually use the new pegboard in my office. I solved the problem of shelves that were too shallow with 1×3 furring strips, but the issue of brackets that allow the shelves to slope forward remains. I tried to rig them up to be workable with no luck, so I’m now trying to return the brackets so I can maybe get a different kind. So far the company I bought them from seems to be giving me the runaround, and I’m wishing that I’d just hung some shelves on the wall the old fashioned way because it would have been done weeks ago.

Once I get some shelves up on that pegboard I can add all sorts of function with baskets and jars to corral everything from wine corks to scrap fabric. I’m seriously looking forward to the part where I get to put everything I want and need up on the shelves and get rid of everything else (note also that finishing up the wing chairs will help significantly with the clutter issue in the office).

And last but not least, I’d like to get started on the nursery in the next month or two. I’ve got so many plans and ideas swirling in my head, but I know from experience that it’s better to wait and give my ideas some time to marinate before I start taking action. I’ve got a pinboard and a set of notes on my phone completely dedicated to collecting ideas and inspiration, and the more I think about it the more things are starting to come together in my head.

So that’s not too bad of a list, right? There are some smaller projects running in the background, like planting and tending my veggie garden, sprucing up the yard and porch for spring, and generally keeling the house clean and organized. I think it’s totally doable.

Super Cheap Custom Rug Pad

I have been loving the vintage yellow shag rug that I got for a mere $40 on etsy. It’s the bees knees.

But you can see in this photo from the first day I got it that it was prone to slipping around and getting bunched up. Juliet’s face rubbing activities totally threw it for a loop. You can imagine what kind of havoc a cat wrestling match would wreak on it.

It really had the feeling more of a blanket that had been spread across the floor than an actual rug. This is the same quality that allows me to throw it in the washing machine, which is nice, but it needed some more substance. Bee tee dubs, I have had occasion to wash it already thanks to a certain somebody peeing on it to let me know her feelings were hurt. I’m not naming any names, but let’s just say she’s got a mustache and a jealousy complex. I guess I would have issues too if people were always comparing me to Hitler.

But I digress. Onto the rug pad. I wanted something thick and cushy, which meant it could easily get pricey. My rug is also oddly sized at 5.5 feet by 7 feet. A 4×6 pad would be too small and a 5×8 would just be wrong all around. Somehow I got the idea to use regular ‘ol carpet padding. I figured since people buy it in much larger quantities (like for a whole house) it would be relatively inexpensive for a little area rug. I kinda thought it would be complicated though, like maybe I’d have to talk someone into selling me a remnant from a larger purchase. But to my surprise, on my last trip to Lowe’s I noticed a bunch of smaller pieces rolled up and tossed on top of each other near the back of the flooring department. I went up to the service desk and asked the lady who was working there and she said I could buy a pre-cut 6×9 piece for $26. I’d seen the sign above the remnants that said they were only 48 cents per square foot, though, so I asked her if I could buy a smaller piece by the foot and save a little dough. She didn’t seem thrilled to have to drag out a remnant and cut it down to size for me, but she did it. I could see from her work that it was really easy to cut with a box cutter so I didn’t bother her about the width, just the length. For only twenty bucks I took home a 6′x7′ rectangle of lush padded goodness.

I neglected to take any progress pictures, but it was so freaking easy. I just laid the pad down under the rug, smoothed it all out, then used a pair of heavy-duty scissors to trim it to size (including those rounded corners).

The padding gently grips both the rug and the floor so things don’t slip around so much anymore and I can march right across it with reckless abandon. Plus it’s now extra cushy to boot. Perfect for a certain man in my life who likes to lounge right where Pistachio is sitting while he plays Major League Baseball 2K7. He’s a man of simple pleasures.

Funny story before I sign off: as I was walking out of Lowe’s with my roll of carpet padding some guy who works there hollered at me, “It’s a boy!” I smiled and said, “It is a boy.” Then he said, “I know. I can tell by the structure of the belly!” I laughed out loud. This was only a few hours after I fainted at Goodwill and was mortified by all the people freaking out about the pregnant lady fainting, so it was kind of nice that this guy gave me a good laugh. And before all of you freak out about the pregnant lady fainting, let me just say that I’m fine, it’s happened to me before (years ago), and it’s because I was standing up in one spot at the register for like twenty minutes while they tried to fix the credit card machine. I guess I locked my knees or didn’t move my feet around enough or something. I felt myself getting lightheaded but was too embarrassed to say in front of the approximately 27 people in line behind me that I needed to sit down. I know now that it’s much, much, much more embarrassing to actually pass out in front of all those people. They were all very nice and concerned but I hope I never see any of them again because I was absolutely humiliated.

So that’s how I spent my day off of work for Mardi Gras-public humiliation, discussing the structure of my belly with strangers, and adding a little cush to my tush when I plop down on my rug. Laissez le bon temps rouler!

How to Hem a Pair of Jeans

I’m a pretty thrifty person in general, but I am extremely cheap when it comes to clothes. I just don’t care about them enough to spend a lot of money on them. The bulk of my wardrobe was found either at Goodwill or on a clearance rack, and I like it that way.

Once my belly started getting bigger, which happened much earlier in pregnancy than I expected thanks to an extremely short torso, I needed some new clothes. The belly band didn’t work for me much past the first trimester. I know a girl who is due in May and still wearing regular jeans with a belly band! I’m really jealous. The selection of maternity clothes is much smaller than that of regular clothes, so there are fewer treasures to be found in thrift stores and blowout sales. Add to that the fact that I’m ridiculously short (standing just a smidge under 5 feet), and you can see why I’ve found it nearly impossible to find affordable, flattering clothing to fit my new figure.

I finally turned to the internet in desperation. Although few things entice me less than buying a pair of jeans online, I felt I had no choice. After a good bit of searching I finally found a pair I was willing to give a try.

Loved By Heidi Klum Under Belly Super Stretch Slim Leg Maternity Jeans

They didn’t come in petites, but the dark wash and skinny fit made them the kind of jeans I would have bought even if I didn’t have a burgeoning belly to consider. And at $40 they weren’t the cheapest jeans I ever purchased, but the price wasn’t completely unreasonable. So I ordered them, and I wasn’t disappointed. They were waaaay too long though, so something had to be done about that.

I actually tackled the hemming of the jeans back in January, but I haven’t posted about it until now because I’ve been meaning to go back and make them just a wee bit shorter. I finally decided, though, to just leave them the way they are. So I give you, dear internet, my method for hemming jeans. A short girl’s lifesaver.

First I laid my new jeans out on the floor.

Then, I took a pair of pre-pregnancy jeans that fit me well and laid them out on top of my new stretchy-waisted wonder.

I pulled one leg out to the side and tried my best to line up the inseams.

Then I cuffed up the leg of the new jeans to be the right length.

I was going to keep the original hem, so I should have cuffed them just a little bit higher so that the seam lined up in the same spot, if that makes sense. This is why they ended up just a smidge too long.

Once I thought I had the length right, I made sure the fold was straight all around and used some straight pins to secure.

Then I took it over to my sewing machine and used my zipper foot to sew all the way around.

I turned the fabric so that the cuff was now folded up inside the jeans and took a gander at my work. To my dismay, it wasn’t looking quite as snazzy as I had hoped.

So I went back to the sewing machine and tried again, this time getting all up in that original seam’s business. I tried to get as close to the thick bottom hem as I could without sewing right on top of it.

And when I turned it inside out I wasn’t disappointed! You’d have to be looking at the hem really closely to realize that there was extra material folded up in there.

I repeated the whole process on the other leg, then used my iron to press the folded part flat. I’ve worn and washed these a bunch of times since then and haven’t had to iron it again. It pretty much stays put. If you wanted to you could cut the excess fabric off, but I figure skinny jeans will probably not be en vogue by the time my next pregnancy rolls around so I will likely give these away or sell them when I’m done. Chances are their next owner will not be so short, so I wanted to keep the option of letting them back out.

Here they are being modeled by yours truly. I wear them, like, every day. And I love them. At first I thought they were still too long and I kept meaning to go back and make them a little shorter, but I’ve gotten over it. The little bit of extra bunching at the bottom is so not worth the effort.

Can you believe that I’ve lived my whole life being so short and never ever hemmed a pair of pants before? The cost of professional alterations has steered me away from many an adorable purchase (I told you, I’m super cheap). Now that I’ve done this I feel like my bargain-hunting horizons have been even further expanded. And if I can hem a pair of jeans, what’s stopping me from hemming a skirt or dress? It can’t be that hard, right? It’s a brave new world of clothing selection, my friends.

If You’re Bendy and You Know It Clap Your Hands

I took the plunge this weekend and made my very first purchase for the nursery. Very exciting! Let me tell ya, I had to work for this thing. I saw it listed on craigslist for $15 on Friday and called the number provided right away. I knew from the moment I saw it that I wanted this thing. The ad said it was in Zachary, about half an hour north of me, but the guy who answered the phone told me that he could meet me the next day at his shop in Baton Rouge. “Just call me when you want to come see it and I’ll meet you there,” he said. Sounds wonderful, I said. So I called him the next day about 11 and he said, “Oh, I’m at my shop but the chair is in Zachary. I’ll head up there to pick up the chair in a bit and bring it back here. I’ll call you.” Okay, great, I said. Nick and I wanted to leave town soon to go visit his parents that evening, but I talked him into cooling his heels while we waited to hear back from the guy. By 2pm, I got impatient and called him. “Oh, it’s raining, it would get all wet if I tried to move it today. How about tomorrow? Just call me.”

Well dude, I thought to myself, you’ve got a good point that it’s raining, but you could have called and told me you changed your mind. How was I to know you wouldn’t be moving it in a van or SUV? I bit my tongue, though, and politely asked if we could go ahead and set something up for tomorrow instead of leaving it with the open ended, “just call me,” that had served me so poorly thus far. So he said he would bring it to his shop tomorrow morning and I could come by anytime between 10am and 7pm. Awesome.

We got back from visiting Nick’s parents about 3:30 that afternoon and headed straight to his shop. It was all kinds of sketchy, and this is coming from a girl who frequents bad neighborhoods in the name of social work. And guess what? He’d forgotten the dang chair! I was so annoyed. He suggested that we come back tomorrow, but the crestfallen look on my face must have spoken volumes because after Nick had agreed to come by after work the guy suggested that maybe he could just run up to Zachary and get it now. Yes, please, that would be wonderful, I said. Nick and I (with Juliet in tow) killed time on the wrong side of town for an hour before finally, finally, after a weekend of hopeful anticipation, getting to meet this lovely lady in person. So worth it, I said.

Ta-da! It’s a bentwood rocker. And obviously in need of some TLC.

Adding an upholstered cushion to the seat will be a cinch. I got lots of experience with that working on my dining room chairs. The caning on the back appears to be in good condition, but I haven’t decided if I’ll keep it or replace it with upholstery.

As for the cats, they made quick work of checking it out to make sure everything was structurally sound.

Pistachio took care to double-check the caning.

I don’t know what I’m going to do about the wood. It’s all scratched up. I may paint it, or I may step wayyyy outside my comfort zone and take a shot at sanding and refinishing it. And of course there’s always the option of leaving it as is, rendering cat claws and matchbox cars harmless against it.

I’ll probably wait until I have most of the other big pieces of furniture in the room before deciding exactly what to do with it. I cleared all of the old stuff out of here a few months ago and it’s sooo exciting to have the first piece of official nursery furniture moved in. I even took it for a spin with various pets acting as baby stand-ins. It’s very comfy and I find the gentle rocking motion quite pleasant. Bonus: my feet actually touch the ground, which makes rocking significantly easier. I can’t wait to pretty it up a bit and put some miles on it with an actual baby in a little over four months. OMG, is he really going to be here that soon?!? I’m freaking out.

Five Months Pregnant

I will be 20 weeks pregnant tomorrow! I usually save these posts for Monday but this week I just couldn’t contain myself.

Nick was stuck at work late yesterday and I really wanted to do this post today, so I snapped the picture myself using a tripod and self-timer before it got too dark out. Kind of awkward running back and forth from the camera over and over again, but I got ‘er done.

We had our second ultrasound this week and found out that IT’S A BOY! If you have seen me since Wednesday chances are I’ve shown you a picture of my baby’s penis. I thought it might be a little embarrassing for him if I put such a revealing picture on the internet, though. I totally understand that some people may not be into this sort of thing at all, so if you are sooo over me talking about my kid already please forgive me. I’m obsessed. Without further ado, cue the gratuitous pictures of my child:

Can you believe that there’s a baby inside of me??? It’s crazy for me to see him in there like a little person, sucking his thumb and everything! As for the boy factor, I thought that I wanted a girl. I really did. But as soon as I found out I was having a boy I realized that’s exactly what I wanted. How could I not be thrilled to see that little guy dancing and playing on the screen? And I’m excited that I can finally start making concrete plans for the nursery. I’m really loving the idea of gray walls with blue, green, and yellow accents (sound familiar? That’s pretty much how I decorate everything lately). And of course I’ll be trying to man it up a little for my little man. Making things boyish may be a little outside my comfort zone, but I really want the room to be able to grow with him and not scream “baby” (even if ruffles and frills are a little more my speed).

I can’t believe how quickly time is flying by. At this rate July is going to be here before I know it. I can’t help wishing that things would slow down a little. This girl has got some preparing to do!

Make It POP Like a Peacock

When I put up the pegboard above my desk last week I stepped back to take a look, squinted my eyes to imagine it with crisply painted white shelves, and promptly decided that the whole thing looked a little “blah.”

I thought that maybe painting the shelves a fun color would be an easy way to add a little pizzazz (especially since I hadn’t yet painted them). But then blogging buddy and frequent commenter Kindra chimed in with a stroke of genius: why not paint the pegboard?

Real Simple

The Vintage Glitter House

Better Homes and Gardens

Mama likey. But what color to paint it? Kindra suggested the color of a peacock’s neck and, once again, I decided Kindra was a genius. This isn’t the first time I’ve been inspired by a reader. My Aunt Julie once left a comment suggesting the use of a painter’s dropcloth as a rug in my living room and I totally ran with it (see that post here). So keep the great ideas coming, people. You blog readers are a wealth of knowledge and inspiration!

So, once I decided to paint the pegboard “the color of the peacock’s neck,” I was tasked with figuring out how to translate that into an actual paint color. I’m kind of over picking out colors from paint companies. I just wasn’t feeling it this week. So I decided to go back to my oldie-but-goodie method of just recklessly mixing colors in a tupperware container until I like what I see. I’ve painted several pieces of furniture using this method and it hasn’t failed me yet. The ability to tweak the color if I don’t like what I see is very empowering. I knew I wanted the color to be a deep blue green, so I gathered all my blue and green paints on the kitchen counter along with a leftover cottage cheese container to mix it all up in.

I started out with a healthy dose of grass green (left over from painting my sewing desk) and what was left of my navy blue (another shade I mixed up myself for the inside of the drawer in my mustard coffee table).

Things were already looking a whole lot richer once I stirred it up. I think that’s a putty stick I was using to stir. I found it in my drawer of painting supplies and it seemed like a good tool to use.

Next I added another shade of blue (left over from the dresser and armoire upstairs).

A quick stir and things were looking quite spiffy, but something was still missing.

So I gave it a squeeze of black acrylic (yes, I mix types and finishes of paint with reckless abandon).

At this point I was really feeling hopeful. Look how much deeper and richer it is than the grass green I started out with.

All that mixing happened after dark, which is never a good time to judge a paint color. So I painted a swatch on the pegboard that night but waited until the next morning to judge it. In the light of day it seemed just a smidge too green for me. I wanted more blue.

So I went back to the kitchen and added about half a sample pot of mistint pale aqua I picked up for a dollar on one of my many trips to Lowe’s (I like to pick up mistints when I’m there for cases exactly such as this).

The difference is subtle, but I liked it.

After painting a little swatch I was so satisfied I went ahead and covered the whole thing with two and a half coats. The nice thing about working with flat paint is that if things are looking a little sketchy after only two coats you can go in and touch up the problem areas without doing a formal third coat. I’m lazy, so I like it this way.

I’m thrilled with the color. It reads in real life as a very deep, complicated green. Like Kermit the Frog when he ran out of Prozac. It’s a nice contrast to the green undertones on the wall and the color of the sewing desk (which is painted the same grass green I used as a base for this color).

Now that I’ve got the “pizzazz” situation under control, the next step is to finally add some function to this thing. I had lumber cut for shelves almost two weeks ago but forgot to grab brackets, then when I went back to pick them up I realized Lowe’s didn’t carry pegboard shelf brackets in the size I needed. So I turned to the internet, where I was able to order a dozen 12″ brackets for about $25 after shipping. They came in yesterday and I was so excited! That is, until I realized my shelves were 1″x10″ (which is actually 1″x9.25″ in real life). What was I thinking? I tell ya, my brain has been completely turned to mush lately. I even missed an appointment with my doctor yesterday because I could have sworn it was scheduled for today (luckily they were able to reschedule me for today). As if the sizing situation weren’t bad enough, the brackets allow the shelves to slope forward. A pencil rolls right off. So I’ve got to either 1) buy more lumber in the correct size (but it will still be a little short because of the way lumber is dimensioned), or 2) find a way to add just over two inches to the width of the shelves. I’m thinking gluing a length of 1×2 trim to each is the way to go, and that remaining quarter inch will just have to resolve itself. As for the sloping issue, maybe I could place something under each of the brackets to force the bottom of each up a little? Or use some of those locking plastic pieces I made fun of the other day to make sure the top of each bracket rests snug against the pegboard? Suggestions are welcome. I’m soooo over trying to figure this out on my own.

A Fancy V-Day Dessert

Happy Valentine’s Day, lovely readers! I hope the day is treating you well so far. Nick and I are not really Valentine’s Day kind of people, mostly because we’re not into crowded restaurants and giant stuffed animals. We like to keep things simple. In fact, I just asked Nicholas and neither of us can even remember what we did for V-day last year. Just the other day he actually said to me, “So, is Valentine’s Day always on February 14th, or is it one of those things that just happens randomly?” I laughed and laughed. This will be our last lovey-dovey holiday as a childless couple, though, so we thought it’d be nice to celebrate quietly at home. Are you ready for the menu? It’s very fancy.

  1. Spring mix salad (loosely based on this one)
  2. Crescent rolls from a can
  3. Frozen lasagna
  4. Chocolate covered fruit

Very fancy, I’m telling you. I’ll be slaving over that frozen lasagna for hours. All sarcasm aside, I guess the salad will be the hardest part. But if I’m feeling tired after a long day of work I am not at all opposed to making it as simple as possible. As for the chocolate-covered fruit, I had big plans for trying this approach (spotted on Pinterest, of course):

Pinterest

The description said this was created with the help of an ice cube tray. So genius, right? Fill an ice tray with melted chocolate, put strawberries in, and then freeze them. Nick and I gave it a shot last night while dinner was cooking. In real life, though, we just couldn’t figure it out. I think it’s one of those things that works out better on the internet. Or we’re just not that smart in the kitchen. Could go either way. Nevertheless, here’s what we ended up doing.

We just held the strawberries by their stems and dipped them one at a time into the chocolate (white chocolate chips melted in the microwave with a little vegetable oil to smooth it out), then placed each upside-down in the ice cube tray to harden. It took a little finagling to get ‘em in there upside down, but we just kind of went with it. We tossed some chopped up banana in the leftover chocolate (fishing each piece out with a toothpick), piled them on top of the strawberries, then poured the rest of the chocolate over the whole operation for good measure. It may not look beautiful, but it’s a heckuva lot easier to store in the fridge than a cookie sheet covered in wax paper and I have a feeling it’s going to be crazy delicious.

So that’s our big Valentine’s Day plan. A day at work, gorging ourselves on frozen lasagna, and picking chocolate-covered fruit out of an ice cube tray with our bare hands. Hopefully not on the couch, but eating at the table versus on the couch is an ongoing point of contention in our house so we’ll see who wins this battle. It will all be very romantic, I’m sure. And actually, the best V-day I could imagine.

How Many Pegs Can a Pegboard Peg?

Really, how many pegboards do I need in my house? Answer: quite a few. Houses as old as mine weren’t exactly built with storage in mind. I guess folks in the twenties just didn’t have nearly so much stuff, and we modern residents have to get creative to keep things from getting too cluttered. So after we had a pegboard cut to size to address our storage problem in the office last week there was no way I was letting the 3′x4′ remnant go to waste. I had big plans for that sucker.

In a cruel twist of irony our house actually has a huge closet that makes the other two (that’s right, only three closets total in this joint) look like shoeboxes. It’s unmanageably large, actually. And the long and narrow dimensions aren’t doing us any favors.

As you can see, we pretty much rely on it to serve the functions of a shed, garage, and attic all in one, none of which we actually have. Technically, we do have an attic, but it’s not floored and the entrance is barely big enough to squeeze a person through, much less a bunch of stuff we want to store. So all the stuff that would go in an attic (or in some sort of utility storage like a garage or shed) gets tossed in here instead. We’ve got rarely used items and Christmas decorations tucked up under the stairs, all of our tools perched in the spaces between the studs, paint cans and random crap lining the top shelf, and spare lumber piled up near the back. Some people who live here have a bad habit of leaving the most recently used items near the entrance, though don’t ask me what the ice chests are doing there because we haven’t used them since last summer.

This closet has some big organizational problems. Bigger than I was willing to tackle on this particular day. But I was willing to take one small step: I was going to hang up that piece of pegboard. I marked out where I wanted it to go and Nick drilled holes for it right into the studs. We didn’t need to attach small pieces of wood behind it like a pegboard usually requires since the studs were exposed like this. Very convenient.

Then we screwed it into the wall. Easy peasy. While I had Nick handy I had him move some things around so there wasn’t such a logjam at the front of the closet. The big stuff got pushed to the back so it was still accessible but out of the way. The barstool, in case you’re wondering, is what I use to climb up and access the top shelf. I’m not quite as spritely in my pregnant state and have recently started abiding by a self-imposed ban on climbing up on things, but I don’t have anywhere else to put the barstool anyway, so it stays. Maybe I’ll find myself standing on it again in another six months or so.

We just attached the pegboard to those three studs furthest from the camera. It wasn’t quite long enough to stretch across all four studs so we had to choose one or the other, and I was thinking the further back in the closet it was the better. I suppose I could have scooched it over a bit more so that it was centered across those three studs, but I didn’t.

I picked up this assortment of pegboard accessories at Lowe’s last week for about $7. It was kind of hard to tell what it all was poured out like this, though. I remember from the pegboard at my old house that those black things are to help secure the hooks to the board, but I always found them kind of useless.

I decided to hang all the hooks up on the pegboard so I could see what I was working with.

Then I got started hanging my stuff up. These heavy, dangerous, precariously perched tools were pretty high on the priority list.

Ta-da! I feel much safer and less stressed walking into this place now.

Look how nice and neat everything is! Y’all just have no idea how happy this makes me. It’s like a little organization island in a sea of chaos.

There’s still a lot of empty space on the far side of the pegboard, but all I’ve got left is small hooks. What I really think I need next is some hanging baskets and bins for all the small stuff, and maybe some sort of contraption to hang screwdrivers and pliers and whatnot.

There’s still a ton to be done in this closet, not the least of which is some serious purging. But I’m taking babysteps, people. Babysteps.

Friday Funday

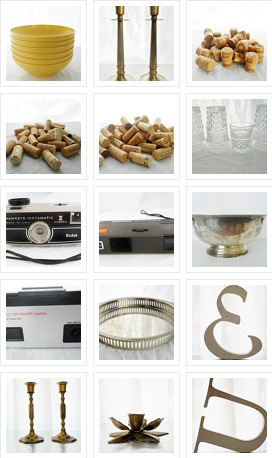
I made it through another week! This one seemed to just fly by. I’ve been staying busy and keeping happy. Life is good, people. So good that I decided to give myself a little break from posting about projects today. Besides, I’ve been meaning to tell you that I added some new items in my shop, Living La Vida Vintage.

I especially love those brass planters. Since I’ve started venturing into houseplants again recently it was really hard for me to resist the temptation to keep them for myself. Or at least pop a plant in there while I wait for them to sell. But it’s one thing for me to borrow some whatnots from the shop to grace my mantle, and another entirely for me to fill them with dirt and living plants. What would I do with the plants when they sell?

Speaking of borrowed whatnots, I’ve realized they’re an untapped treasure of awesome. Most of what you see here is not actually mine to keep. But since I only stock the shop with stuff I’d use in my own home, why not enjoy them while they’re here?

This little mantle is pretty much my favorite thing to look at the past few days. I’ve never had anything pretty on it before so it’s nice to walk in the room and see something besides piles of clutter. Looking at it now, though, I think I should switch out that red-spined book for a navy-turquoise blue one I’ve got in my stash of stuff to sell. It would go with the other colors in the room better.

In other news, I’ve got some projects brewing for this weekend. I blew almost all of my home decor budget the first week of this month so I’ll be getting creative with cheap-ish stuff for the next few weeks. On the agenda: painting the pegboard (thanks Kindra for the suggestion!), making use of the smaller piece of pegboard I’ve got leftover, a little bit more gardening, and researching sources for remnant carpet padding to put under my yellow rug (I got ahead of myself with the other projects and forgot my resolution to make the rug pad a priority in this month’s budget). And of course there will be plenty of house-straightening and tv watching and general puttering about tossed in for good measure. As always, thanks for reading, and I hope you each have a great weekend! See you Monday!

DIY Garden Markers (plus a roundup of other ideas)

After I was finished planting two different varieties of tomato in my new veggie garden, I realized they looked a lot more alike in the ground than I had realized. Maybe I’ll still remember which is which come April or May, or maybe not. I’d rather not be stalking the wrong plant for signs of that first tomato though, so I figured some sort of identification system was in order. And of course I wanted it to be cute. I turned to my two internet BFF’s, google and pinterest, for ideas and inspiration. Here’s what I found.

Twigs!

Martha Stewart

Clothespin + bamboo skewers. I actually have some bamboo skewers lying around so this one appealed to me.

Glue and Glitter

While we’re on the topic of supplies I’ve got lying around, add half a quart of chalkboard paint to the list (leftover from this project). It would be so easy to slap some on those free paint stirrers you can pick up at any hardware store. A china marker/grease pen would stand up to rain better than chalk.

Cakies

And check out these rocks. Totes adorbs. Except I am not nearly so artistically gifted as this person clearly is, so maybe I could use some of that chalkboard paint. Or a sharpie.

Flickr user Reebert

And OMG, even after selling several hundred wine corks in my Etsy shop I still have plentyl eft in my stash. Corks, skewer sticks, and a sharpie. All necessary components for this project. All items I already have. Can’t beat that.

My Chic Life

So many inexpensive and adorable solutions to my little horticultural conundrum. I didn’t feel like gathering rocks, though, and I wasn’t sure where to hunt down a grease pen, and I knew there was an abundance of wayward sticks hanging out in my front yard. So Martha’s twigs won my favor.

I grabbed a stick from beneath my oak tree and brushed off the excess dirt in my kitchen sink.

Then used a pair of garden snips to break it into four pieces.

It was really easy to scrape some of the bark off of each with a vegetable peeler.

I had a fine point sharpie, but I think it ran out of ink. So I used an especially inky pen instead to write the name of each variety on the little sliver of exposed wood.

I kind of struggled a bit with writing it nicely. Penmanship has never been my strong suit and bare wood isn’t exactly a forgiving medium. They do their job in the garden, though!

They bring me an obscene amount of joy.

So for those of you who are still weeks or months (or years, if you are just not at a “gardening” place in your life) away from having any need for garden markers, put this in your pocket for that warm spring day when your soil has thawed and the sun is shining and you want to add a bit of cute functionality to your horticultural adventures. They’re 100% free, given you’ve got sticks lying around, and easy to whip up in 15 minutes or less. Can’t beat that with a stick (ha!).