Archives For How To

More than a year after embarking on this gig called motherhood I am still struggling with the task of keeping my little man organized. Poor Nick can’t keep up with all the new systems I put in place to try to streamline the clothes, the toys, the diaper bag, etc. We’ve reached a breaking point and I am on the verge of a big purge. The guest room is packed with piles of stuff I need to sort through to store or donate, but before I tackle it I want to make sure I’ve got everything in his room exactly how I want it. No sense in storing away all those outgrown clothes only to find something I missed at the bottom of a drawer, right? Leave it to the perfectionist in me to rationalize why I should be making cute closet dividers instead of sorting through the pile of crap in the spare room.

The closet dividers are necessary because until recently we’ve kept the majority of Jack’s clothes in his dresser. I don’t know why I ever thought that was a good idea. Especially as we move into the unpredictable fall/winter, I need to be able to see his clothing without rifling through piles. It’s not at all uncommon in Louisiana to be bundled up in October but wearing short sleeves on Christmas, so bring able to assess what’s warm and what’s not at a glance is key. The second problem is that I have had a hard time to date with keeping track of what’s almost too small, what fits just right, and what’s not yet grown into. Enter the closet divider. There’s a vast selection of cute ones on Etsy and The Container Store has some blank ones for only .99 each, but with no Container Store near me and no patience for waiting for shipping I decided to make some myself with supplies already had.

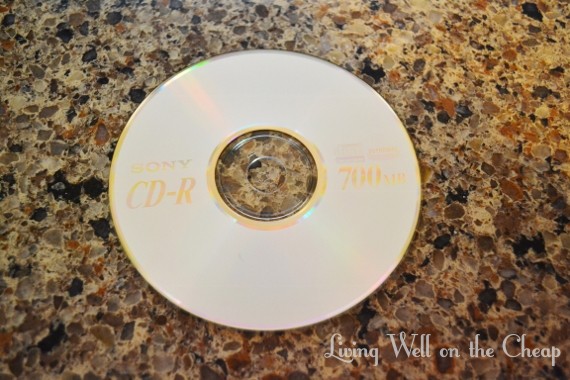
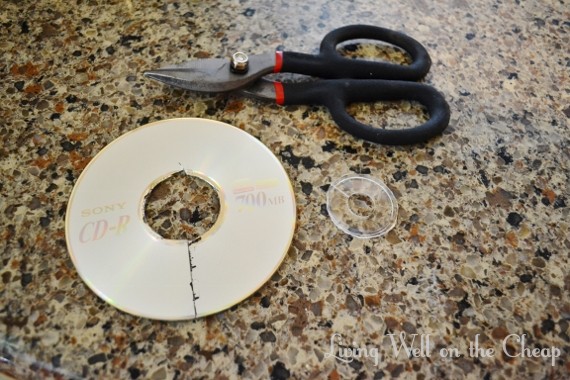
I’ve got a huge stack of these blank CD’s that I bought years ago because I needed just one. I feel certain I’ll never use them all, so I didn’t mind sacrificing a few to the cause. If you don’t have any CD’s you don’t mind ruining, you could use cardboard, foam core, or even thick cardstock instead.
055 (570x380)

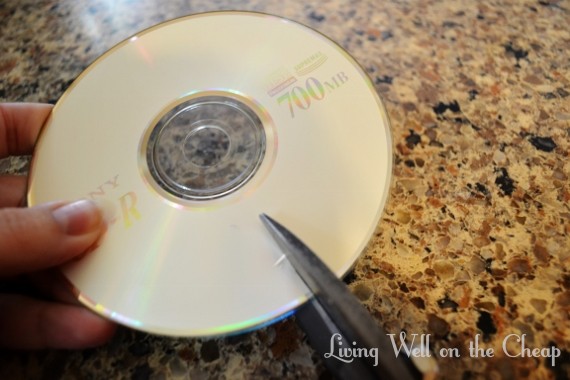
I used a set of wire snips to cut a slit at the bottom, then a circle from the center. If you don’t have wire snips some sturdy scissors or some sort of scoring tool may work even better.
056 (570x380)

058 (570x380)

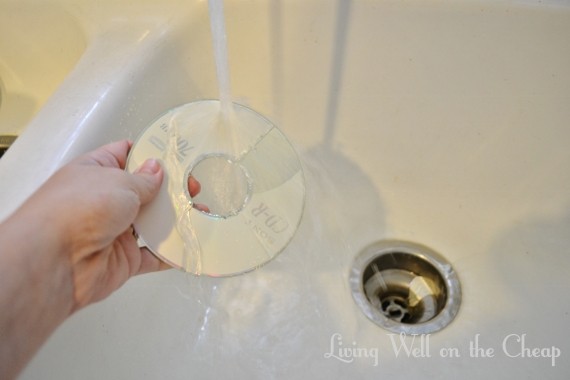
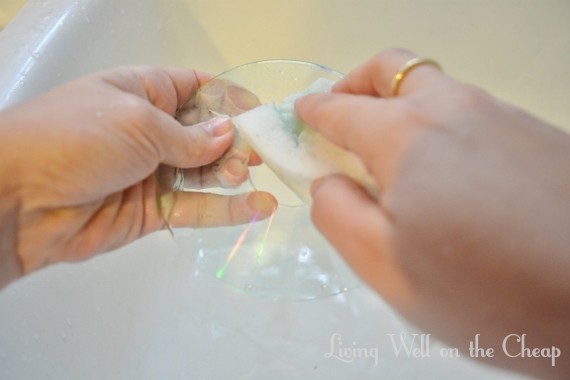
The metallic film came off in large chunks under warm running water, then I used a magic eraser to scrub away the blue-green coating and any bits of foil that remained.
061 (570x380)

065 (570x380)

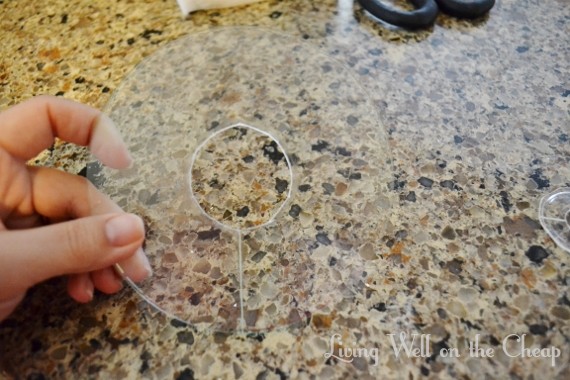
With the plastic all cleaned up, I used a nail file to smooth the edges that I’d cut. I’m not trying to win any beauty pageants here; I just wanted to remove any bits that might scratch me.
068 (570x380)

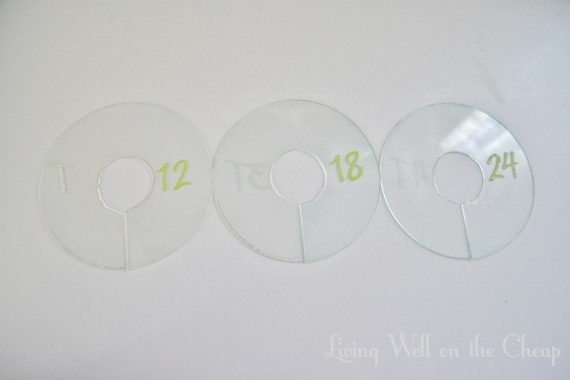
I repeated this process on three disks, then used scrapbook letters to label them with the three sizes that are most relevant to us right now-the size he’s growing out of, the size he’s currently in, and the next size up.
078 (570x380)

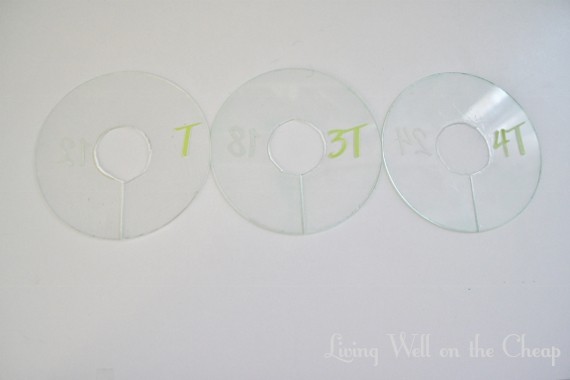
AND THEN I flipped them over and labeled the reverse with the next three sizes. When he completely outgrows all his 12 month clothes I’ll steal the 2 (I ran out of 2′s on my sheet of scrapbook letters), stick it next to that T, and put it at the other end of the closet to be 2T. Likewise, 18 months will become 3T and 24 months will become 4T. Genius, no?
073 (570x380)

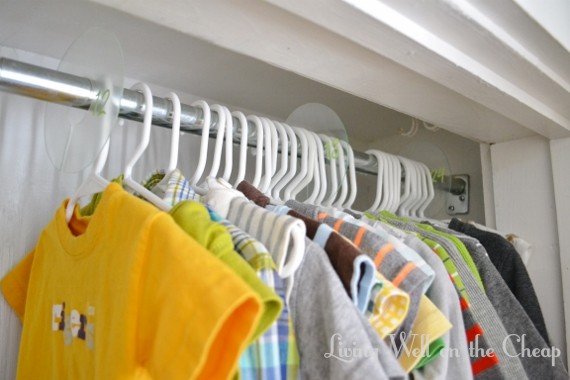
Here they are in his closet! I’m pretty sure this system will be easier for Nick to keep up with than “the ones I like best go on the right side of the drawer, the ones that are kind of ugly but I need for when I’m behind on laundry go on the left side of the drawer.” If he can just read the labels and put them in the proper sections I can pick out what’s cute/weather appropriate easily and also see when it’s time to go ahead and pack away that outgrown size. Here’s to hoping.
081 (570x380)

If you have any tips for managing the chaos of kid clothes pleeeaaassse share. I’m drowning in hand-me-downs to-be-handed-downs.


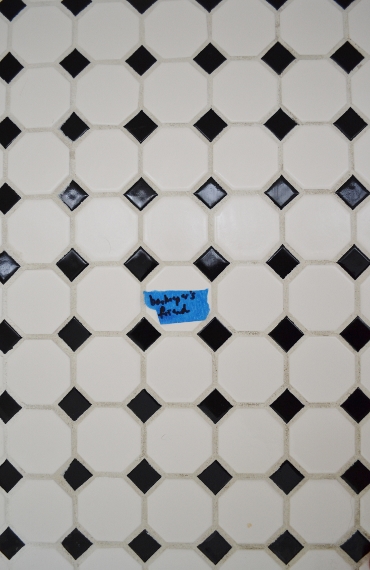
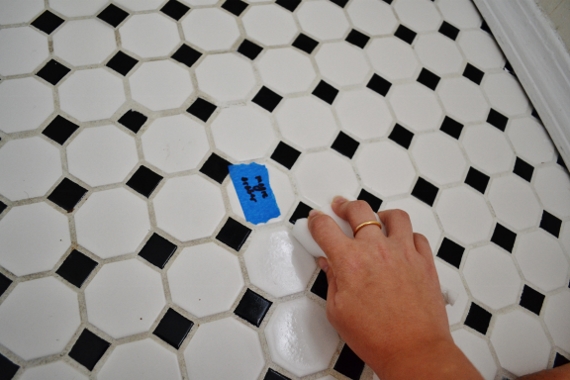
Last week I posted about the stained, dingy grout in my downstairs bath and asked for tips on how best to clean it. My goal is to get it white enough to seal, and since this room is on the large side as far as bathrooms go I need something that is relatively easy and inexpensive to implement. Well, you all did not disappoint! I’ve spent the last week implementing your suggestions in a very scientific and well-organized tournament-style experiment. Realistically, I just put down a piece of painter’s tape every five tiles and wrote a different technique to try on each one. First, the losers. Most of these worked alright, but not well enough to tackle years worth of grime.

Barkeeper’s Friend: Better, but not good enough. In person it was still pretty dingy.

bkpf (370x570)

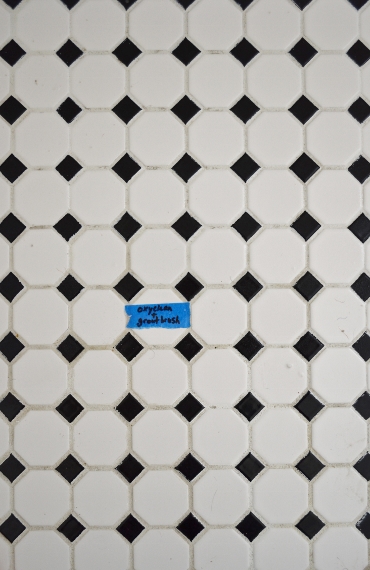
Oxyclean: I love this stuff for laundry but for hard surfaces it disappoints. I dissolved a pretty strong combination in water and tried scrubbing it with both a grout brush and a magic eraser. Even if it did work well it still wouldn’t have been my preferred technique because if you don’t rinse away every last trace it dries with a white film.

oxyclean (370x570)

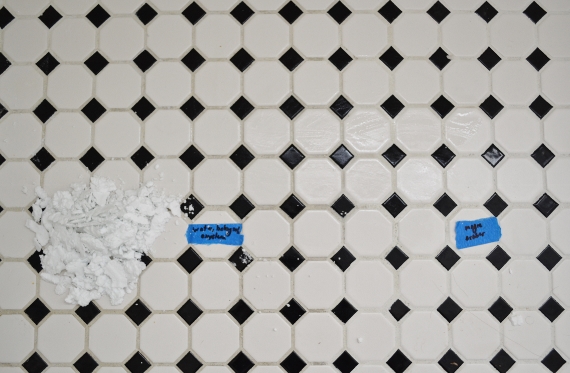
Baking Soda + Oxyclean Paste: my problem with anything pasty is that it’s a pain to clean up afterwards, as evidenced by the pile of caked up powder pushed off to the side of this photo. The area directly above the painter’s tape is where I’d applied it and you can see that it didn’t make a huge difference.

bsoc paste (570x373)

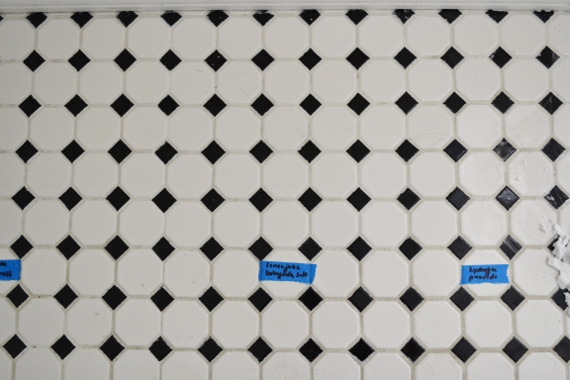
Lemon Juice, Baking Soda, and Salt: another paste that was just alright. Nothing to write home about.

oc, ljbss, hp (570x380)

The big winner was actually discovered by accident. One commenter suggested spraying on hydrogen peroxide and letting it sit, while another suggested simply scrubbing with a magic eraser (I assume using plain water since that’s typical magic eraser protocol). During one of my cleaning sessions I spritzed some HP onto the area labeled as such, then moved down a few feet to the area marked “magic eraser” and started scrubbing. I hadn’t accounted for my sloping floors and thus the HP ran downhill to where I was scrubbing but hark! Turns out they’re a veritable dream team.

hpme1 (570x380)

Look at the huge difference here.

hpme2 (570x380)

I was so excited that I made a video! But by then my magic eraser was almost dead and the results weren’t quite as stunning as they had been earlier. I’m headed to the grocery store this afternoon and will stock up on enough cheapo store brand magic erasers to scrub the whole house down.

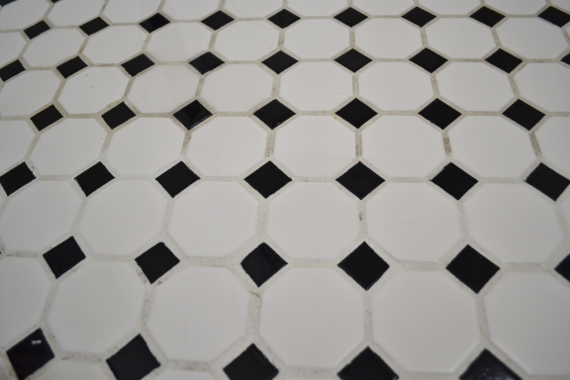
I’m pretty sure this is the first time ever in my adult life that I’ve bought hydrogen peroxide. Turns out it’s super cheap and non-toxic! I remember my mom pouring it over scraped knees and elbows when I was little, but I’d honestly never thought to use it for cleaning until a commenter suggested it. There are still a few dark spots, but the overall effect is quite impressive. After I get the whole room done I’ll assess whether to tackle the remaining stains or to seal it as-is. The idea of sealing in dirty spots makes me twitch but geez, how much scrubbing can I do? I wonder if I could use those grout painting or coloring kits to just touch up here and there before sealing? If I ever find myself in a place to make decisions about tile jobs I am so going with white tiles and dark grout (like this!). White grout is just not practical for people like us!

It’s that time of year. Folks are starting to think about their family photos for the holiday season. If you’re like me you don’t actually get around to it until December, but if you’re planning on having photos taken sooner then props to you. I know not everyone does holiday photos, but for some reason Nick and I started taking them years ago (even if it was just a friend snapping a pic with an iPhone) and I love that it’s become a tradition for us. After we sent out last year’s photo we got lots of compliments on how impressive it was to get all of our pets in there together. If you have any experience with cats you know that they are not exactly obedient creatures.

family cropped (570x407)

My secret: they’re photoshopped. I don’t actually own photoshop and have no idea how to use it, so I’m just using “photoshopped” as a verb there to describe what I did with the photo editing software that came with my laptop (Windows Live Photo Gallery). After many, many “blooper” shots trying to get all three humans and three pets into one photo, we gave up and took one with just us and Juliet.

060 (2) (570x380)

I left my tripod in the same spot, spent a few minutes soothing Pistachio from the trauma of the botched photo shoot, and then perched her on the arm of the couch and ran and snapped a picture before she could move.

005 (570x380)

Then I repeated with Sheila. You can see by her tail that she was still a little bitter over the whole experience., but I called it good enough.

016 (570x380)

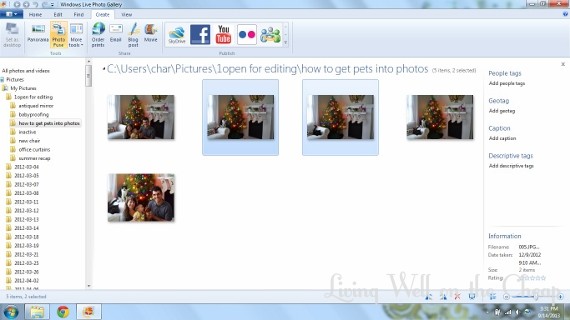
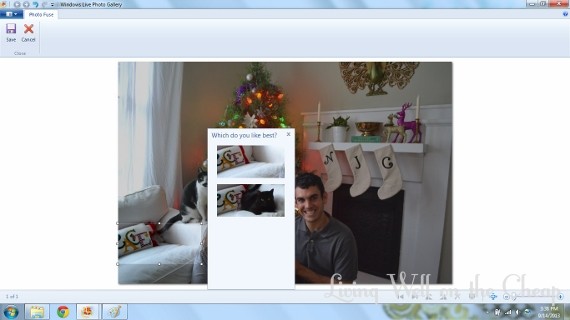
Here’s where the magic happens. I went on my computer and picked out the best photos, then opened Windows Live Photo Gallery and selected the two cat pictures (I recreated the process and took screen shots to show y’all for this post), then clicked “photo fuse” near the too left of the screen. You can see my mouse over it in the screenshot below.

Untitled1 (570x320)

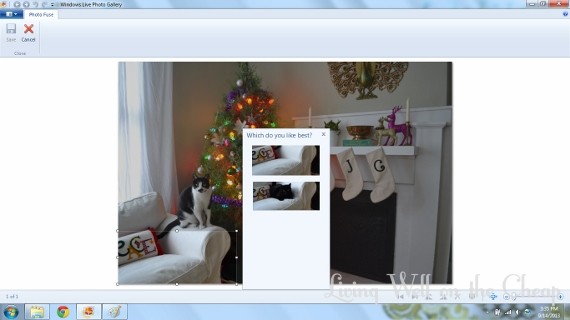
It pulled up the picture of Pistachio as the main image. Then all I had to do was select the blank space where I knew Sheila was hiding in the other photo, and it asked me which one I liked best. I chose Sheila.

Untitled2 (570x320)

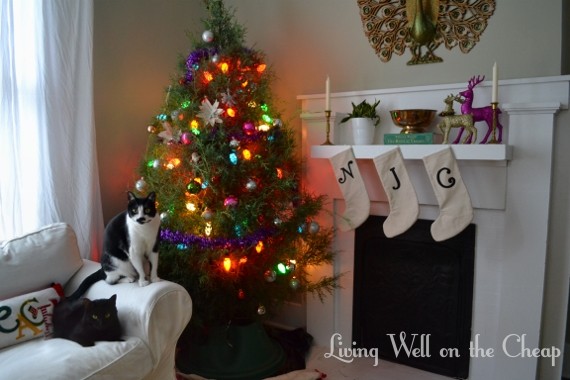
Bam. Two cats, one photo. And Sheila’s angry tail disappeared in the process.

cats (570x380)

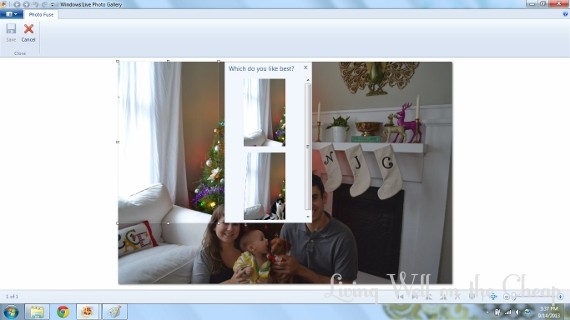
I saved that photo, then fused it with the picture of me, Nick, and Jack. I brought the cats in one at a time by drawing a rectangle around where they sat. It was just luck that Pistachio didn’t mess up my hair, since they overlapped a bit.

Untitled3 (570x320)

untitled4 (570x320)

Ta-da!!!

family (570x380)

The letters on the pillow behind Sheila were a little messy from all that editing, so I cropped it before adjusting the lighting and colors a bit. If you look closely you can see that the curtain behind/above Pistachio is messed up a bit, but I don’t think anyone would notice unless they were looking for it.

family cropped (570x407)

So there ya go! An easy tip to get unruly pets or children into photos with software that I think comes standard on Windows computers these days. I hope y’all each had a lovely weekend. We are back from Austin and ready to get back into the swing of things. Well, I am, at least. Poor Nick was a little bummed about having to go back to work after an entire week off. He and Jack enjoyed spending so much time together. I know he’ll be counting down the days until next weekend!

I’m just going to come right out and say it: I don’t love to travel. Maybe it’s the introvert in me, maybe I’m just old at heart, but I much prefer to stay close to home, taking only short jaunts out into society to be among the people before retreating back to the place I know and love. Nicholas, however, is all about it. He’s not into material things at all and would happily spend all of his disposable income on long weekends spent visiting friends and family, attending sporting events, etc. I die a little inside at the thought. This girl needs some solitude and quiet time. The only vacations I truly enjoy are to the beach, where it’s perfectly acceptable to sit and be silent and stare off into the horizon. Alas, this week I find myself packing it up and packing it in for the second time in a month for the purposes of Nick’s sports obsession (the beach trip was for a fantasy football draft and this one is so he can attend the UT - Ole Miss game. Why does he care about UT and Ole Miss? I don’t understand).

staying organized on road trips

Despite my distaste for travel, I actually get a strange sort of joy in packing the car. I consider it a special challenge to fit everything we need as efficiently as possible. I also make it my mission to keep us organized the entire trip. Exercising control over the management of our stuff helps me cope with the stress of being away from home, I guess. And with a toddler in the mix travel is now much more complicated than when it was just the two of us. Without further adieu, my tips for staying organized on the road:

  1. Make a list. I keep a master list on my phone of what to pack when we travel. Each time we’ve got a new trip planned I’ll copy and paste it into a new note and customize it for that particular trip. Instead of deleting items I’ll place an X or some other symbol in front to mark that it’s packed, then I use the same list to ensure we don’t forget anything when heading back home.
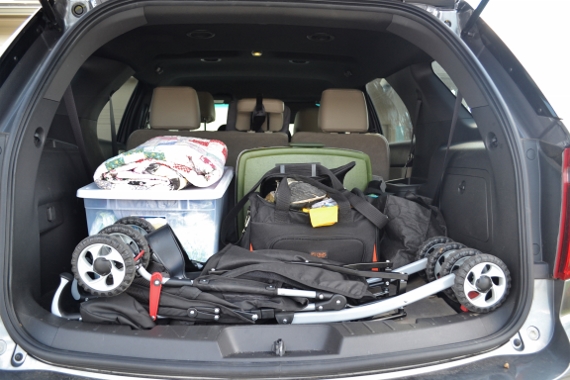
  2. Contain the miscellany. Anything that doesn’t go in a suitcase-food, diapers, camera, laptop, etc.-must go in some sort of container. My go-to technique is to pack all the small, random stuff into a plastic tub like the one you see above. Stuff we’re most likely to use goes on the top, just-in-case items go on the bottom. It makes loading and unloading the car a much simpler process.
  3. Choose your bags wisely. Unless you’re taking long walks through airport terminals rolling suitcases are sort of impractical. Duffle bags and vintage suitcases are much easier to fit together into the trunk of a car and they are easier to stow out of the way once you reach your destination (they all fit under the bed in the hotel where we’re currently staying). Which leads me to my next point…
  4. Unpack if it’s at all practical. I mean, if you’re just staying one night then this might be overkill, but even for just two nights I think that the five minutes it takes to put all your clothes in drawers and your sundries near the sink is worth saving the hassle of digging through a suitcase every time you need something.
  5. Consider what you’ll need on the way. I usually pack two small bags or totes for the passenger area of the car. One contains items we’ll only need when stopped-diapers and wipes, Jack’s bib and portable placemat, etc.. This one does not need to be within my reach. The other bag I put either at my feet or in the backseat where I can still easily reach it and fill with toys, snacks, sippy cups, etc. Even though Jack’scar seat is rear-facing I can easily reach over it from the passenger seat to hand him toys and snacks when he gets fussy.

Bonus tip: bring food. Most hotels have at least a microwave available so we’ll bring oatmeal, squeeze pouches of applesauce (Jack likes it mixed into his oatmeal), raisins, carrots, bananas, peanut butter, bread, fruit cups, granola bars, etc. so that we have the option to eat out or stay in. If there’s a minifridge we’ll even pack an insulated bag with string cheese and whatever else looks good in our fridge at home. Throw in some plastic silverware and microwaveable bowls and you’re all set to serve meals in style. Another item that we always bring is a large blanket, and today we’re taking it and a tote bag full of food out to have a lovely picnic in one of Austin’s picturesque parks. I’m hoping to hit up a thrift store or two along the way, so wish me luck! Have a great weekend, y’all, and thanks for reading!