
Last week I began a somewhat ambitious project-replacing the old bifold doors on our pantry with a pair of Shaker-style doors. Remember how the old doors were too small and difficult to operate? We honestly just left them open most of the time because they were such a pain.

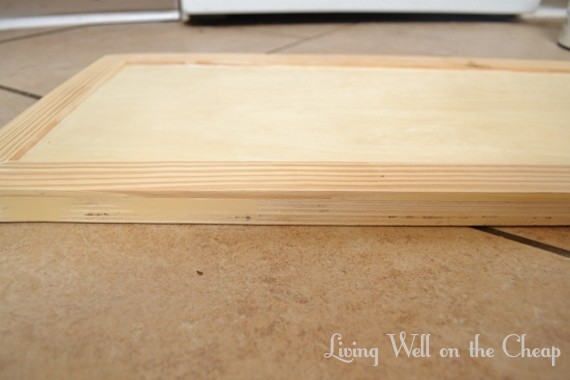
In Part 1 of this project Nick cut some 3/4″ plywood to size and then together we trimmed it out with some lattice strips.

Next I filled all the nail holes and joints with wood filler and sanded it smooth.
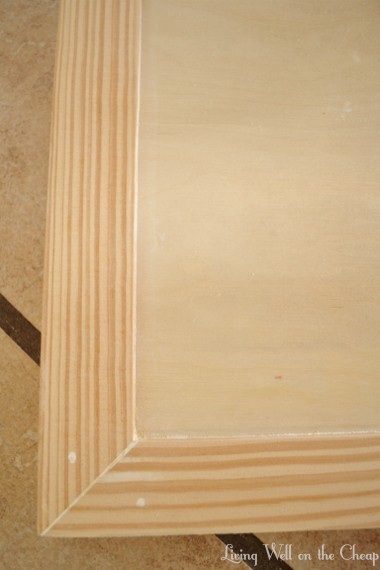
I also filled and sanded the sides to help smooth them out and even any low spots.
Then I set up a painting station, conveniently located so that I could catch up on my DVR while I worked.
I put two coats of primer all over, then two coats of white paint on just the backs and the sides. I left the fronts primed but unpainted so that I wouldn’t stress about the paint getting messed up while we were hanging them. I always use Olympic no-VOC primer and paint.
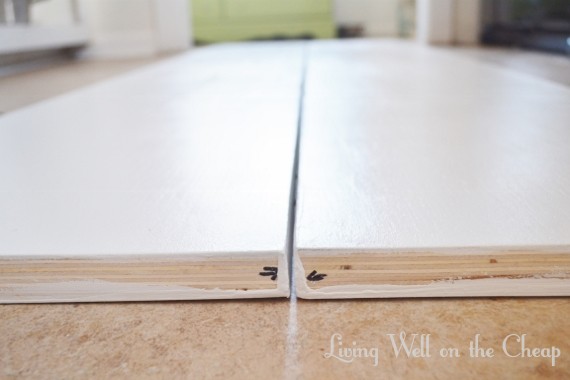
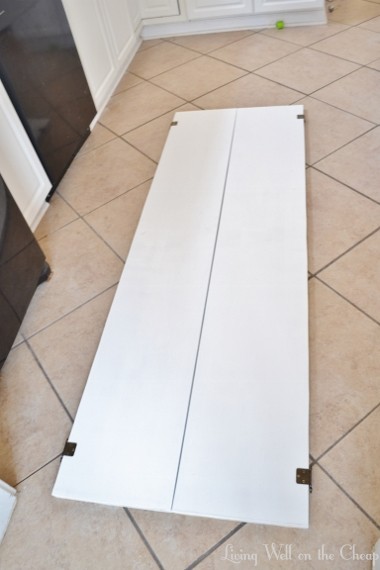
Since we made these doors ourselves they are not quite perfect and if the doors get switched or turned upside down they won’t line up properly. To make sure we kept them oriented correctly I marked the tops with two small arrows using a sharpie. I’d intended to paint over them once they were hung but it’s too high for even Nick to see so I haven’t yet. I laid the doors face-down on the kitchen floors with the arrows pointing together to attach the hinges.
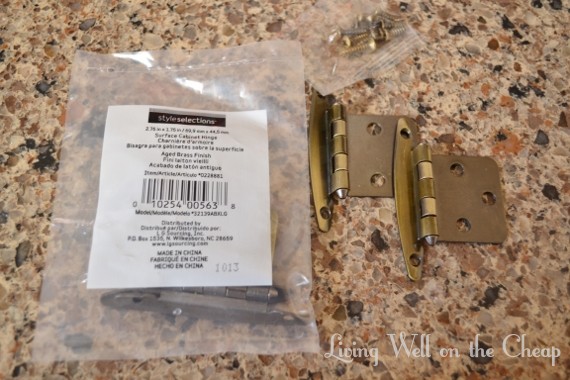
We went with an aged brass finish to match some of the older hinges in our kitchen.
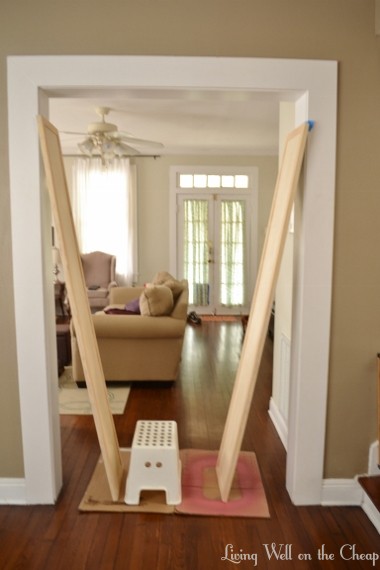
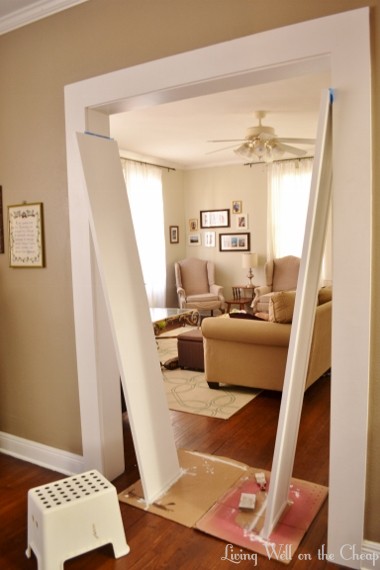
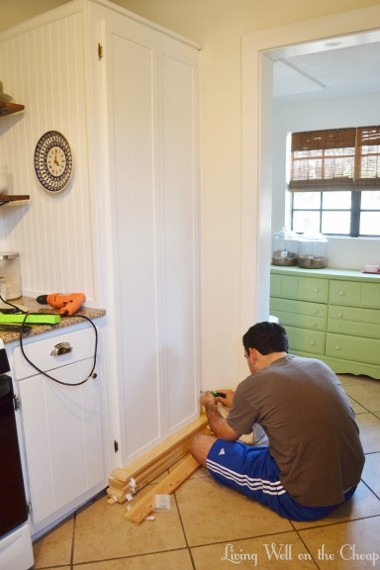
Then we used some scrap wood to prop them in place and, after checking to make sure they were level, we marked, drilled, and screwed the hinges to the frame of the pantry.
I was seriously holding my breath as Nick tightened the final screw and removed the scrap wood. It was kind of a letdown when I saw that the door on the left wouldn’t lay flat!

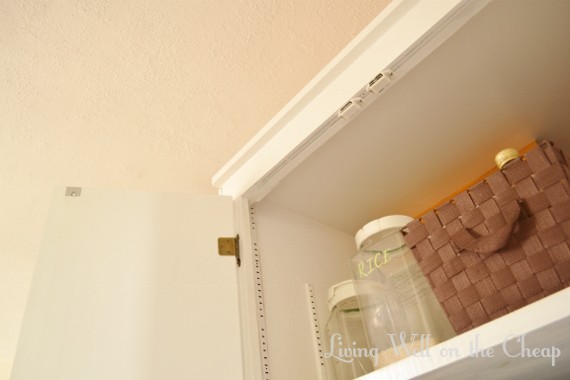
But no worries. I took the opportunity to finish painting and drill holes for the knobs, then went back to Lowe’s the next morning and picked up a pair of these magnetic door catches.
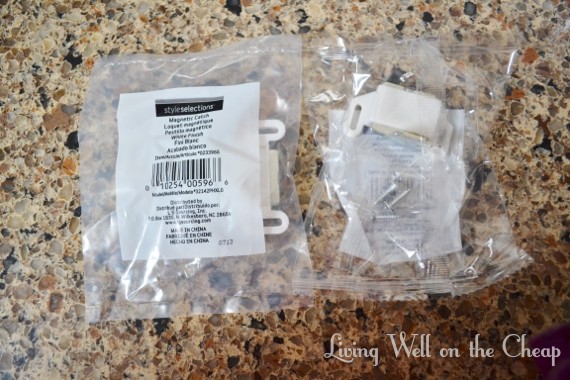
We just attached the magnets to the top frame of the opening and a metal plate to each door. Now the doors stay closed but are still easy to open.
I attached the knobs and-voila-mission accomplished!
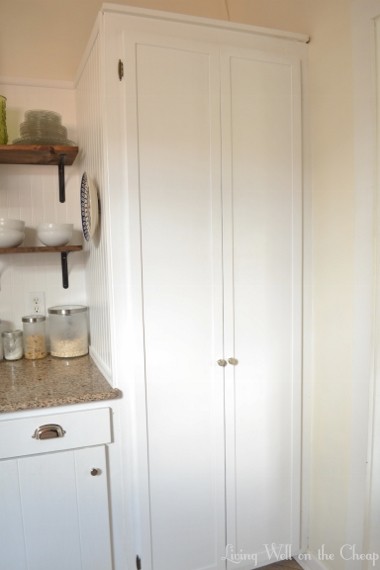
I’m worried they look a little plain and am actually thinking about adding some more trim across the middle near the knobs-sort of like this. It would be really easy to do but I’m going to live with them a little while before deciding.
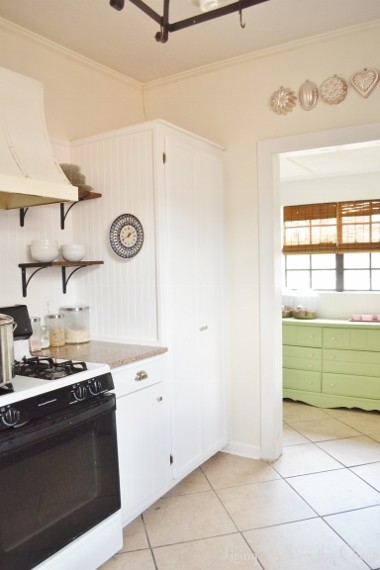
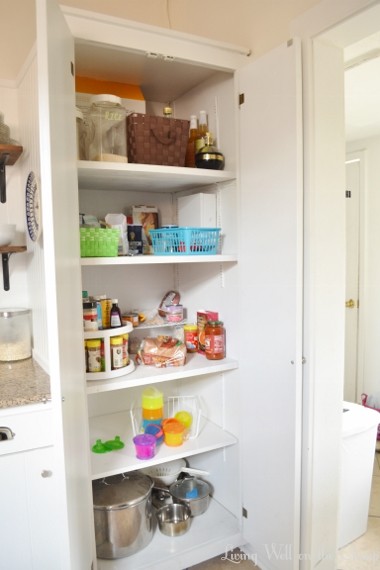
I was surprised to feel a little underwhelmed when they were complete, but when I look back at the photo of the old bifold doors I’m reminded that they are a massive improvement. And now I have an opportunity to create some storage on the insides of the doors-like this and this. It’s hard to say exactly how much we spent on these doors since we used only part of a huge piece of plywood, but I’d say it’s probably around $50. I have been keeping track of how much we’ve spent in total on the kitchen so far and am proud to say that it’s still under $500. That’s not a lot of money for the huge functional and visual impact that the we’ve made. Just take a look back at this “before” photo:
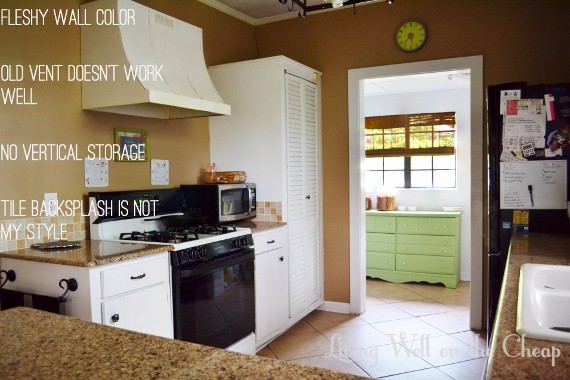
We’re definitely moving now into some of the more functional/less glamorous changes, like finding a new home for the microwave, updating the range vent, possibly adding some new lighting, and organizing, but I do have some fun and easy ideas for decorating and DIY art that will help round out the scary and expensive stuff. Excited!


You may want to add an additional hinge or 2 in the middle of the doors. Since they are so tall, I’m afraid you may be in for some warping since they have to support in the middle holding them on to the frames. I like the finished look though! Nice work!
Hmmm, that’s not a bad idea!
Kitchen projects have been pretty impressive, And you say you and Nick aren’t handy!
It’s the blind leading the blind over here!
I think they look great! I love the clean look, but your right…..they may look nice with more trim in the middle. Either way, it’s an imporovement to the previous doors. Great job!
Thanks so much!
These look great! So much cleaner than those louvered doors with the gap around the edge. As handy as I am, I would never even attempt such a project. I’m impressed!
looks great! the whole kitchen came together really nicely!