
So after yesterday’s post about my total fail in attempting a painted herringbone effect, here’s the rest of the story. My new idea was to attempt the same effect with wood. I had these craft sticks left over from a previous project so I tried cutting them at an angle using a miter box.

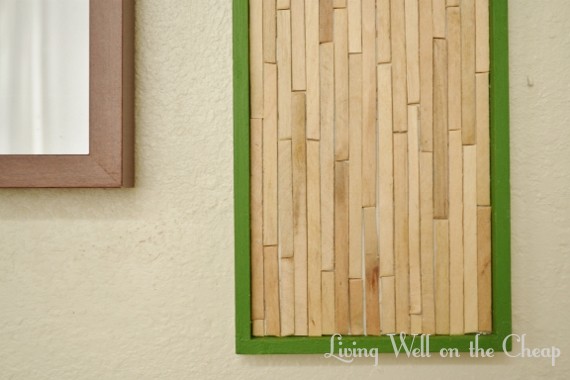
It looked pretty good, but I could tell right off that it was going to take forever to cut all those pieces and that keeping my cuts precise would be a nightmare. Even if I’d decided to butt the straight ends up against each other I still would have needed to cut a precise angle where the sticks met the frame. So I played around with it a little bit and decided instead to lay the sticks end to end like planks in a wood floor. This was perfect for covering up the previous layers of paint and so easy that I knocked it out in an hour.
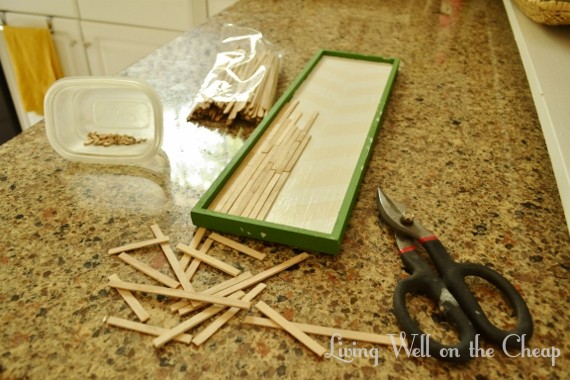
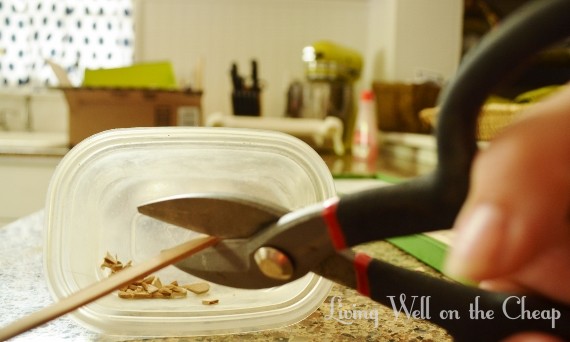
The sticks have a rounded end, so I used a pair of wire snips to cut off the tip. I set up a small container to catch the flying pieces like a soccer goal. I also cut the sticks to random lengths like you would do when installing wood floors.
Once I had a bunch of pieces cut and could tell that it was going to work, I moved my work area to be near an outlet and used a hot glue gun to stick them down one at a time. I did the whole bottom row first, then followed one row at a time. After I was done with the gluing I touched up the green paint where it had been accidentally smeared with white.

I thought about staining some of the pieces before gluing them down to add contrast, but the natural variations in tone were interesting enough that I left it as is. I still haven’t completely ruled out adding something else to the design but I’m just not sure what yet.
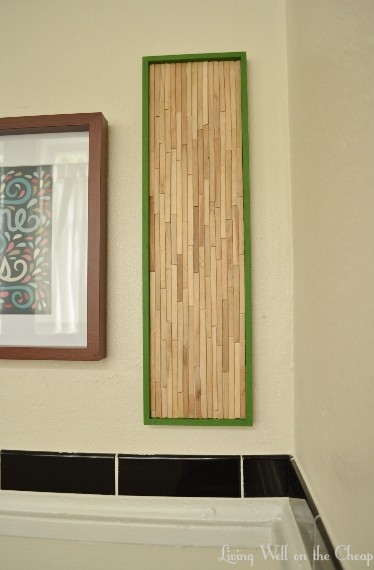
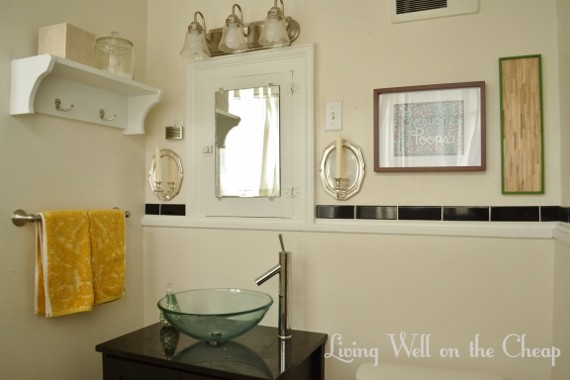
It’s perfect on this sliver of wall in our downstairs bath.
Up close you can see lots of gaps in the wood, but since the back is painted a light color it’s no biggie. I kind of dig it, actually.
This project made me kind of wish that I had a dollhouse in need of wood floors! It was fun and relaxing, which is the exact opposite of what I think it would be like to ACTUALLY lay wood floors.


Great Save! I don’t miss the Herringbone pattern at all. I really like how you married the natural wood element with the kelly green. The light wood choice also looks like it relates to the box you have resting on the white shelf too. Plus, the shape and size does fit in that space perfectly and helps to balance things out. Would you consider repeating a pop of that same green on that same shelf too? I think some small knick-knack painted out in that same bold color would be charming and unify your entire vignette even more
BTW, that seems like a project I could actually accomplish on my own. Thanks for breaking it down. .
This even seems like a project I could actually accomplish on my own — and has given me some inpiration for a couple of different applications.