Archives For Projects

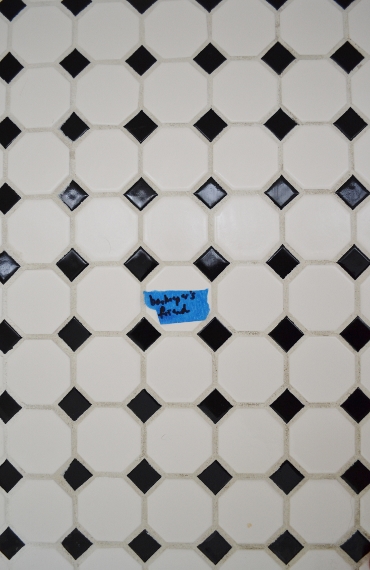
Last week I posted about the stained, dingy grout in my downstairs bath and asked for tips on how best to clean it. My goal is to get it white enough to seal, and since this room is on the large side as far as bathrooms go I need something that is relatively easy and inexpensive to implement. Well, you all did not disappoint! I’ve spent the last week implementing your suggestions in a very scientific and well-organized tournament-style experiment. Realistically, I just put down a piece of painter’s tape every five tiles and wrote a different technique to try on each one. First, the losers. Most of these worked alright, but not well enough to tackle years worth of grime.

Barkeeper’s Friend: Better, but not good enough. In person it was still pretty dingy.

bkpf (370x570)

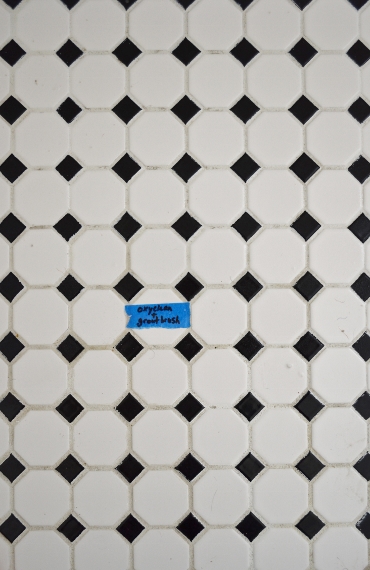
Oxyclean: I love this stuff for laundry but for hard surfaces it disappoints. I dissolved a pretty strong combination in water and tried scrubbing it with both a grout brush and a magic eraser. Even if it did work well it still wouldn’t have been my preferred technique because if you don’t rinse away every last trace it dries with a white film.

oxyclean (370x570)

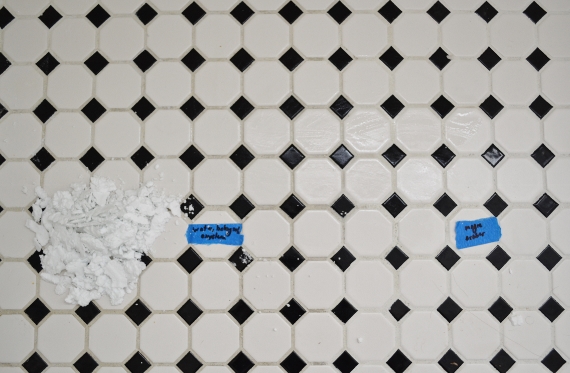
Baking Soda + Oxyclean Paste: my problem with anything pasty is that it’s a pain to clean up afterwards, as evidenced by the pile of caked up powder pushed off to the side of this photo. The area directly above the painter’s tape is where I’d applied it and you can see that it didn’t make a huge difference.

bsoc paste (570x373)

Lemon Juice, Baking Soda, and Salt: another paste that was just alright. Nothing to write home about.

oc, ljbss, hp (570x380)

The big winner was actually discovered by accident. One commenter suggested spraying on hydrogen peroxide and letting it sit, while another suggested simply scrubbing with a magic eraser (I assume using plain water since that’s typical magic eraser protocol). During one of my cleaning sessions I spritzed some HP onto the area labeled as such, then moved down a few feet to the area marked “magic eraser” and started scrubbing. I hadn’t accounted for my sloping floors and thus the HP ran downhill to where I was scrubbing but hark! Turns out they’re a veritable dream team.

hpme1 (570x380)

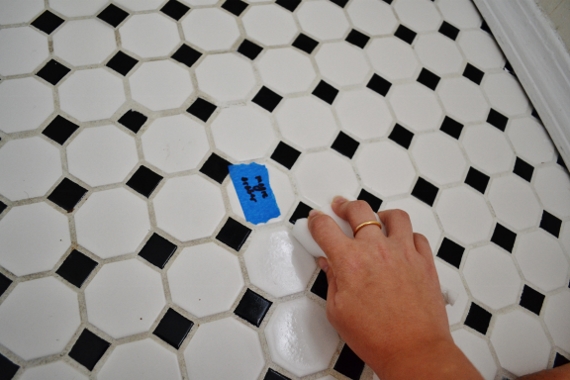
Look at the huge difference here.

hpme2 (570x380)

I was so excited that I made a video! But by then my magic eraser was almost dead and the results weren’t quite as stunning as they had been earlier. I’m headed to the grocery store this afternoon and will stock up on enough cheapo store brand magic erasers to scrub the whole house down.

I’m pretty sure this is the first time ever in my adult life that I’ve bought hydrogen peroxide. Turns out it’s super cheap and non-toxic! I remember my mom pouring it over scraped knees and elbows when I was little, but I’d honestly never thought to use it for cleaning until a commenter suggested it. There are still a few dark spots, but the overall effect is quite impressive. After I get the whole room done I’ll assess whether to tackle the remaining stains or to seal it as-is. The idea of sealing in dirty spots makes me twitch but geez, how much scrubbing can I do? I wonder if I could use those grout painting or coloring kits to just touch up here and there before sealing? If I ever find myself in a place to make decisions about tile jobs I am so going with white tiles and dark grout (like this!). White grout is just not practical for people like us!

Last winter when I was making a bunch of items using vintage book pages to sell in my shop I found myself with a pile of scrap pieces of paper that I couldn’t use. So I did what any sensible person would do-I put them in a jar, hoping that someday I’d find a use for them and maybe I’d just enjoy their prettiness in the meantime. Well, my friends, that day has come. I used some of the larger scraps to make these little paper tassels that you saw on my dining room frame wall yesterday.

097 (570x380)

This project started on a whim while I was drowning my sorrows about LSU’s loss in a bottle of Abita Saturday night. It was only after I’d already completed the first two tassels that I thought, “hey, I should blog about this,” and snapped a few pictures with my iPhone. Step one: collect some long and thin scraps of paper. These were mostly the margins, which had too much white space to use for most other projects but worked just fine for this one.

2013-09-28 20.24.05 (428x570)

Stack them up nicely and pinch them firmly together.

2013-09-28 20.25.20 HDR (428x570)

Then twist, baby, twist.

2013-09-28 20.25.48 HDR (428x570)

Fold over in half. More pinching.

2013-09-28 20.26.15 HDR (428x570)

Optional: use scissors to cut the ends into points, alternating the direction of the slant as you see fit.

2013-09-28 20.29.14 HDR (428x570)

Use some thin string to tie a knot around the top and voila-you’ve got a tassel. I wanted three tassels clustered close together so I tied them accordingly.

2013-09-28 20.32.13 HDR (428x570)

I stuck them up on the wall with a couple of brass tacks that I already had. I’ll be honest-I wasn’t at all sure how they would turn out (which is why I didn’t initially think to photograph their construction), but I’m really pleased! I think it’s sort of symbolic that there are three of them. One for each human who lives here.

082 (570x380)

097 (570x380)

If you don’t have any scrap pieces of book paper lying around you can always find something worthy of destruction at a thrift store, but if that makes you squeamish you could use tissue paper, paper bags, or even fabric. Anything that doesn’t have a strikingly different reverse side should work. You can make them to any size just by cutting your strips shorter or longer. A whole garland of tassels in a warm neutral shade like this would be super cute for decorating a mantel or something of the sort for fall.

Thanks for reading, y’all, and I hope this Tuesday treats you well!

I distinctly remember sitting in trigonometry class and thinking snidely that it was a complete waste of my time. It was at the height of my “teenage rebellion” and I was probably wishing I’d skipped school that day to hang out with my boyfriend (who, of course, had already gotten his GED in juvie. Shout out to Brad if you’re reading this!). Well, eleven years later I find myself watching youtube videos on how to use cosin in the name of decorating. It all started out when I saw this table online and thought I could recreate something similar, but with the proportions of a nightstand instead of a coffee table:

9f365a768da76cb8de15f98dfc673ba9

I was able to find a tabletop, copper pipe, and elbow fittings with no problems, but the piece in the middle where they all come together eluded me. So then I thought I would make one like this instead:

2013-09-15 09.57.55

But that would require me to go back to the store for y-fittings and more pipe, as the ten foot length that I bought wouldn’t be enough to make four 27″ legs and have enough left over for the stretchers. So then I thought I would do this:

001 (379x570)

A three-legged table with angled legs coming out from the center. I kind of liked the modern feel of it and figured it wouldn’t be too difficult. This is where the trigonometry comes in-I needed to figure out at what angle to cut the legs and how long to make them. Feel free to LOL at my work below if you are actually a math person.

004 (380x570)

I was so proud of myself for figuring out that I wanted a 30° angle between the leg and the table, only to have my spirit crushed when I realized I had no idea what that meant for cutting the pipe. So I texted my math-whiz friend Sarah (note to all of my other friends who are good at math-you are all good at math. Please don’t be hurt that I didn’t text you instead) and I think she was kind of confused by the diagrams I kept sending her. She said things like, “Umm…what are the things in that picture?” And then she drew a diagram of her own but she still didn’t know the answer. She eventually just suggested I make something like this instead, cutting the legs at just a 15° angle:

diy-3-legged-table-412x257


Design for Mankind

Yes, that does look quite a bit easier. I think I’ll do that, I guess? This is where you guys come in. How should I attach the legs to the table? Am I making this more complicated than it needs to be? Between this and some coding issues on my blog math and science are giving me quite the beating this week. Yesterday I felt like I’d been working hard through Jack’s entire afternoon nap, then I looked up and realized the house was in shambles and I had accomplished absolutely nothing. Trigonometry and CSS for the win. I don’t know what I’d do without all the technically-inclined folks in my life helping me out!

It’s that time of year. Folks are starting to think about their family photos for the holiday season. If you’re like me you don’t actually get around to it until December, but if you’re planning on having photos taken sooner then props to you. I know not everyone does holiday photos, but for some reason Nick and I started taking them years ago (even if it was just a friend snapping a pic with an iPhone) and I love that it’s become a tradition for us. After we sent out last year’s photo we got lots of compliments on how impressive it was to get all of our pets in there together. If you have any experience with cats you know that they are not exactly obedient creatures.

family cropped (570x407)

My secret: they’re photoshopped. I don’t actually own photoshop and have no idea how to use it, so I’m just using “photoshopped” as a verb there to describe what I did with the photo editing software that came with my laptop (Windows Live Photo Gallery). After many, many “blooper” shots trying to get all three humans and three pets into one photo, we gave up and took one with just us and Juliet.

060 (2) (570x380)

I left my tripod in the same spot, spent a few minutes soothing Pistachio from the trauma of the botched photo shoot, and then perched her on the arm of the couch and ran and snapped a picture before she could move.

005 (570x380)

Then I repeated with Sheila. You can see by her tail that she was still a little bitter over the whole experience., but I called it good enough.

016 (570x380)

Here’s where the magic happens. I went on my computer and picked out the best photos, then opened Windows Live Photo Gallery and selected the two cat pictures (I recreated the process and took screen shots to show y’all for this post), then clicked “photo fuse” near the too left of the screen. You can see my mouse over it in the screenshot below.

Untitled1 (570x320)

It pulled up the picture of Pistachio as the main image. Then all I had to do was select the blank space where I knew Sheila was hiding in the other photo, and it asked me which one I liked best. I chose Sheila.

Untitled2 (570x320)

Bam. Two cats, one photo. And Sheila’s angry tail disappeared in the process.

cats (570x380)

I saved that photo, then fused it with the picture of me, Nick, and Jack. I brought the cats in one at a time by drawing a rectangle around where they sat. It was just luck that Pistachio didn’t mess up my hair, since they overlapped a bit.

Untitled3 (570x320)

untitled4 (570x320)

Ta-da!!!

family (570x380)

The letters on the pillow behind Sheila were a little messy from all that editing, so I cropped it before adjusting the lighting and colors a bit. If you look closely you can see that the curtain behind/above Pistachio is messed up a bit, but I don’t think anyone would notice unless they were looking for it.

family cropped (570x407)

So there ya go! An easy tip to get unruly pets or children into photos with software that I think comes standard on Windows computers these days. I hope y’all each had a lovely weekend. We are back from Austin and ready to get back into the swing of things. Well, I am, at least. Poor Nick was a little bummed about having to go back to work after an entire week off. He and Jack enjoyed spending so much time together. I know he’ll be counting down the days until next weekend!